Flying Pigeon Pose
Eka Pada Galavasana
Teacher: Steph
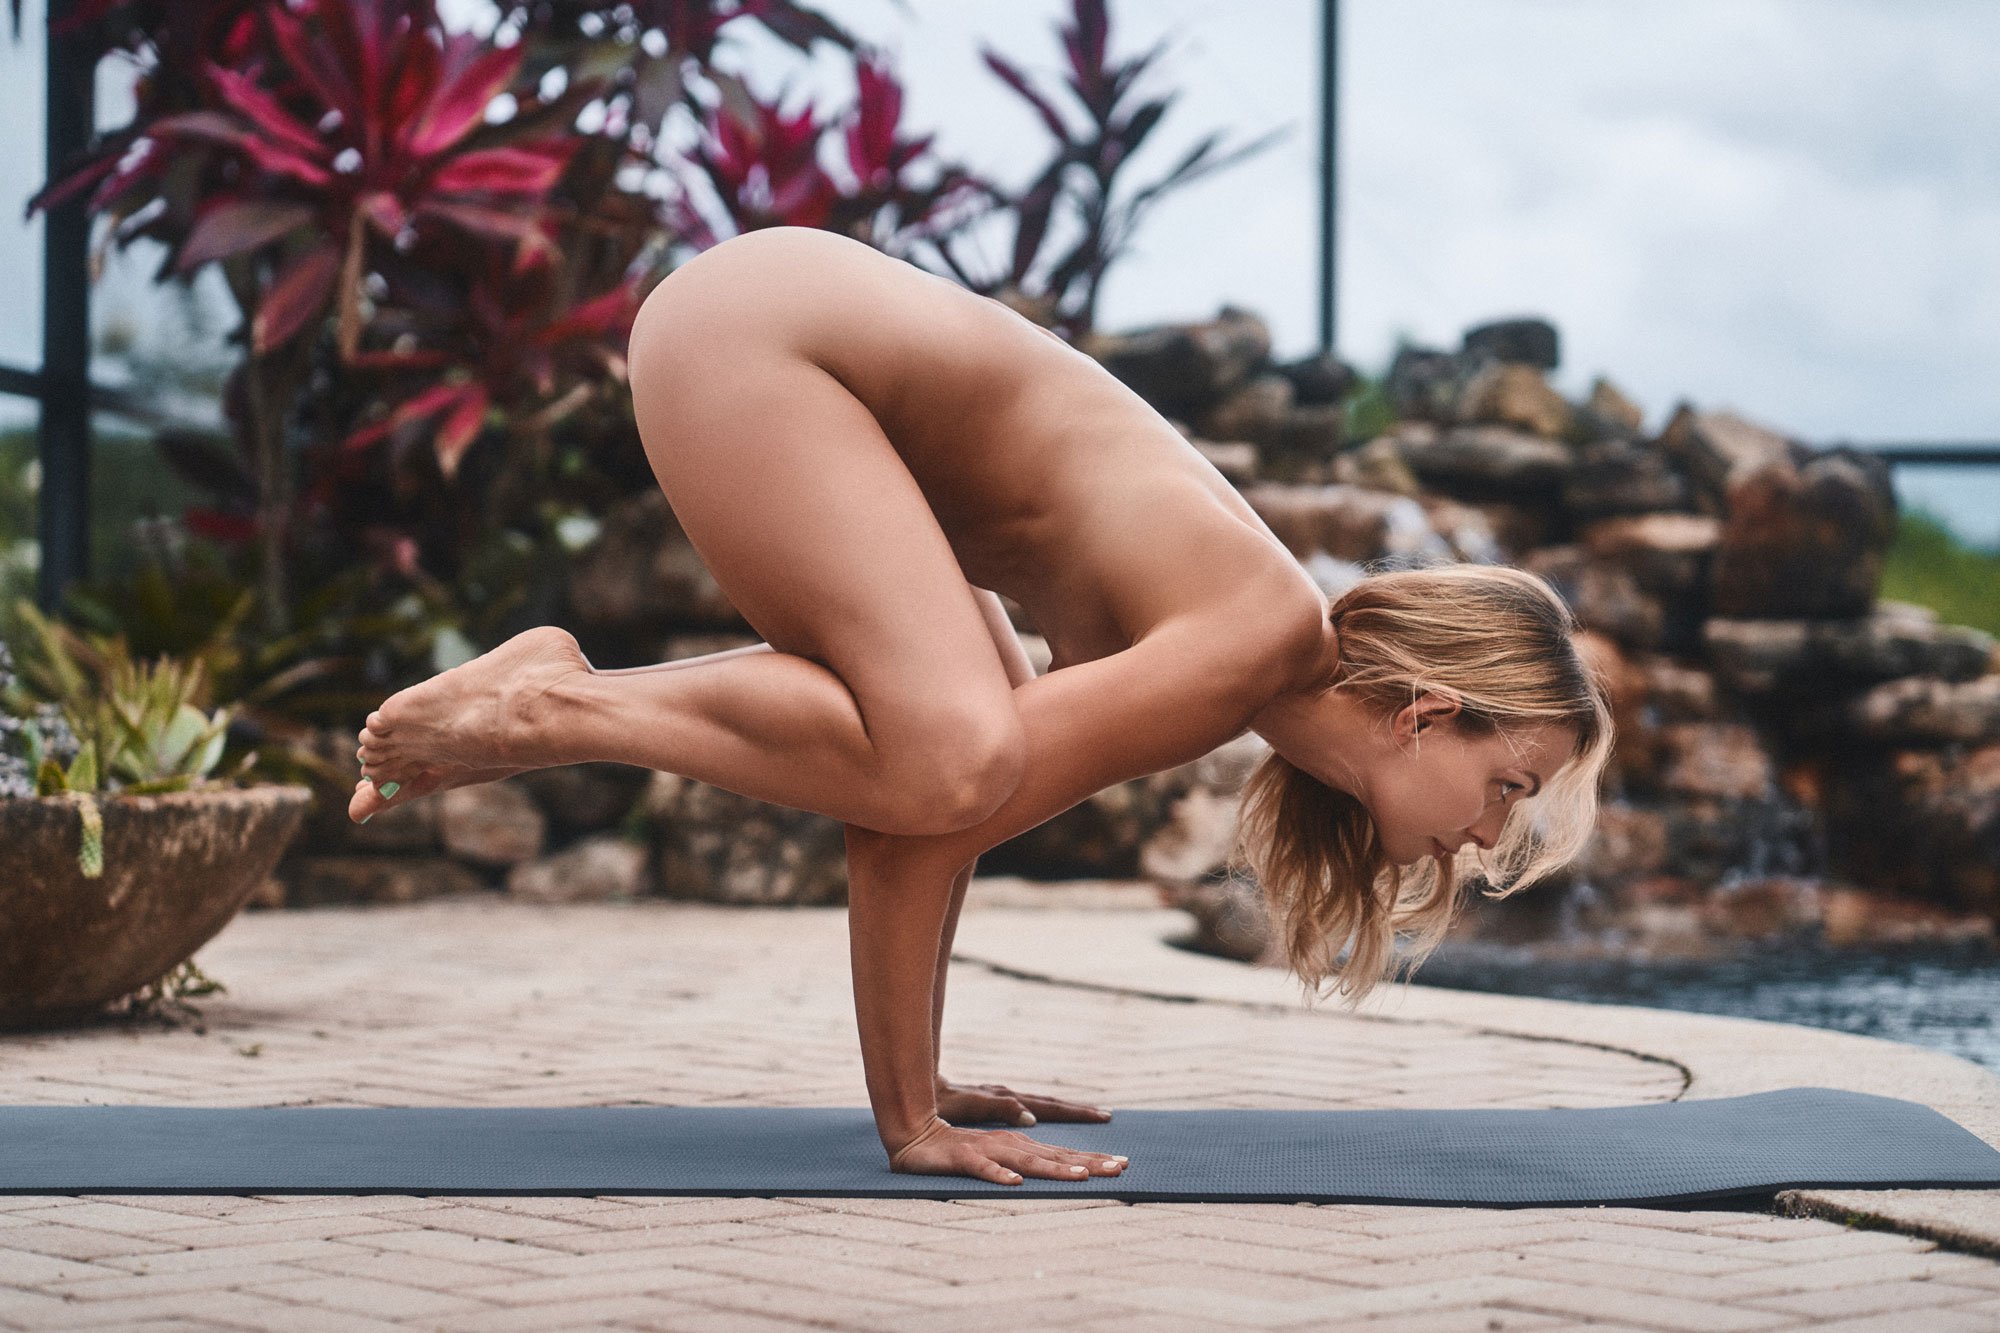
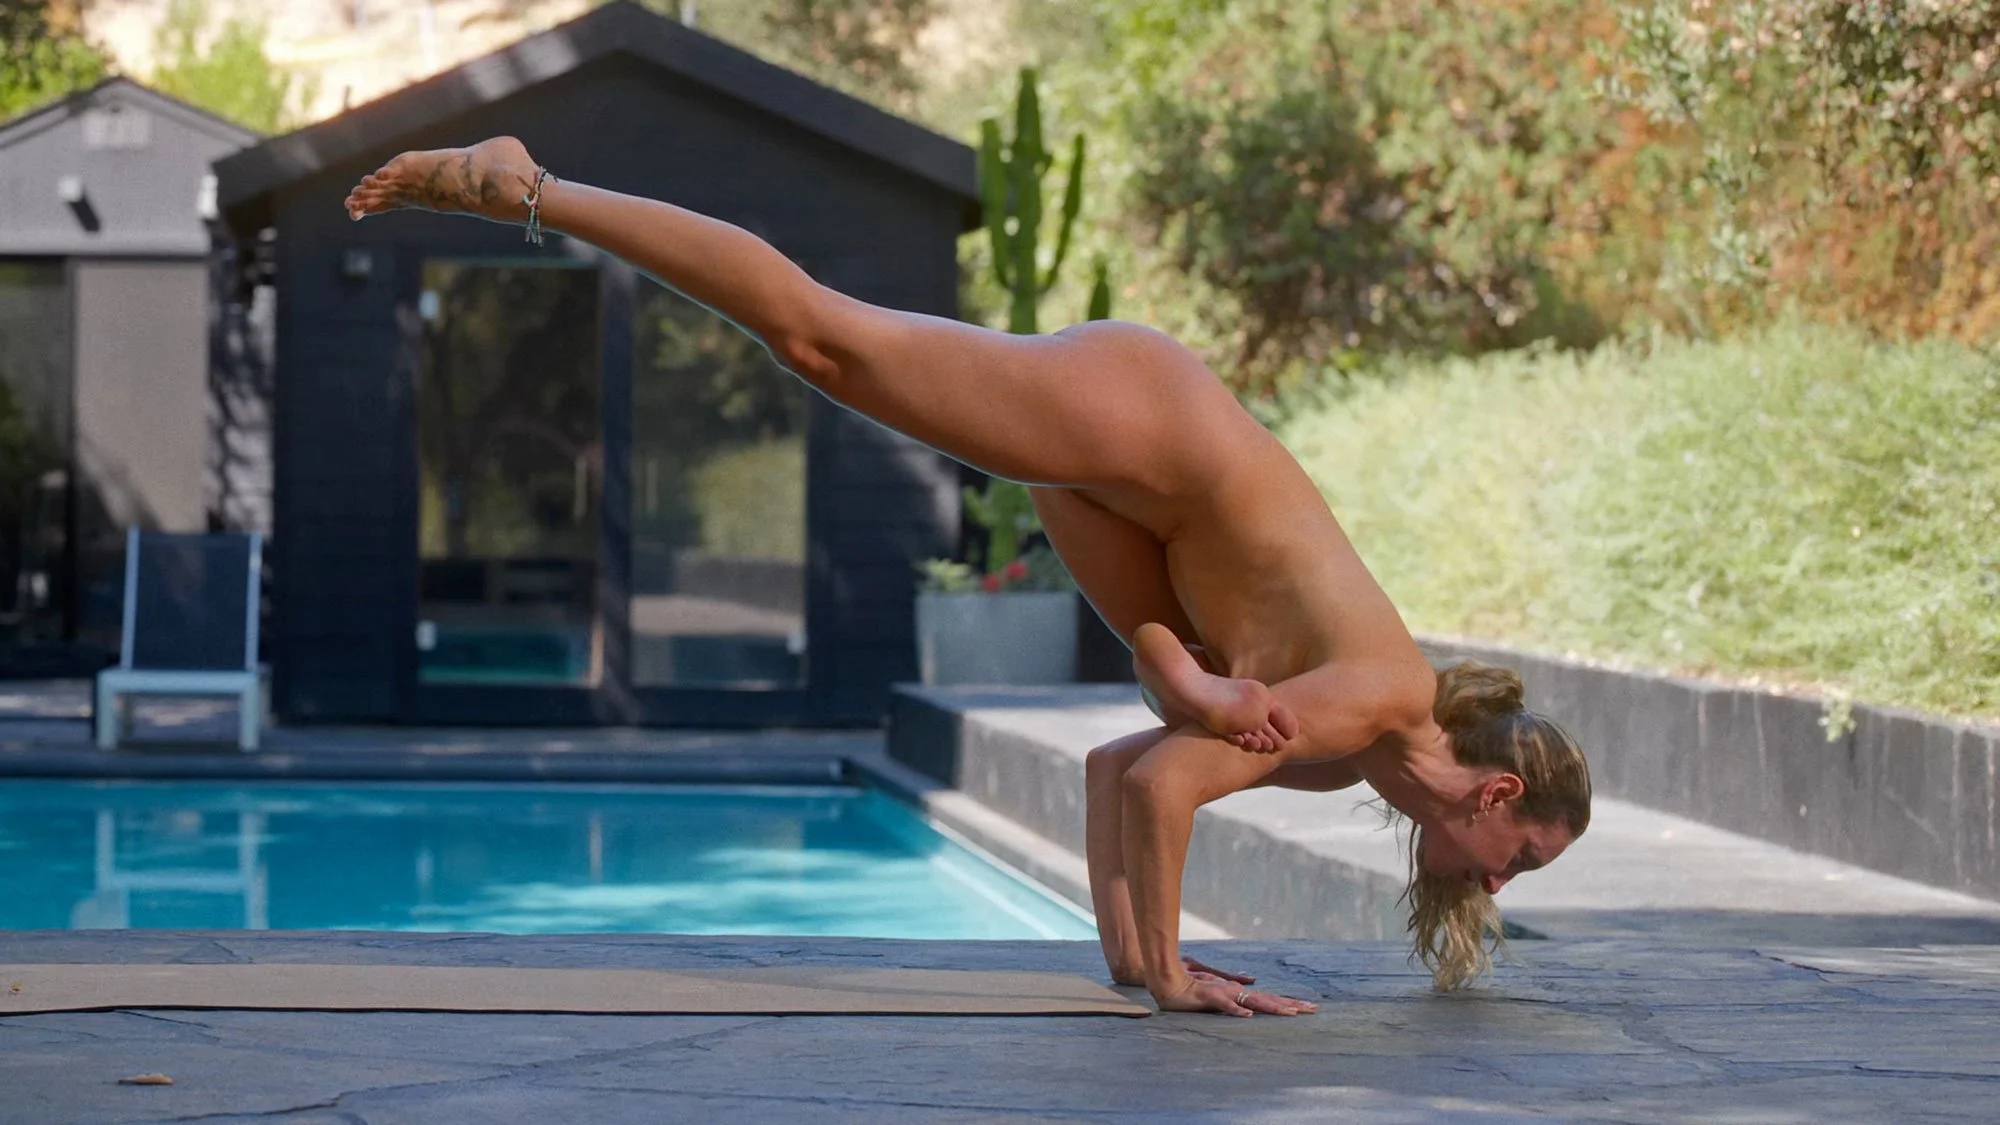
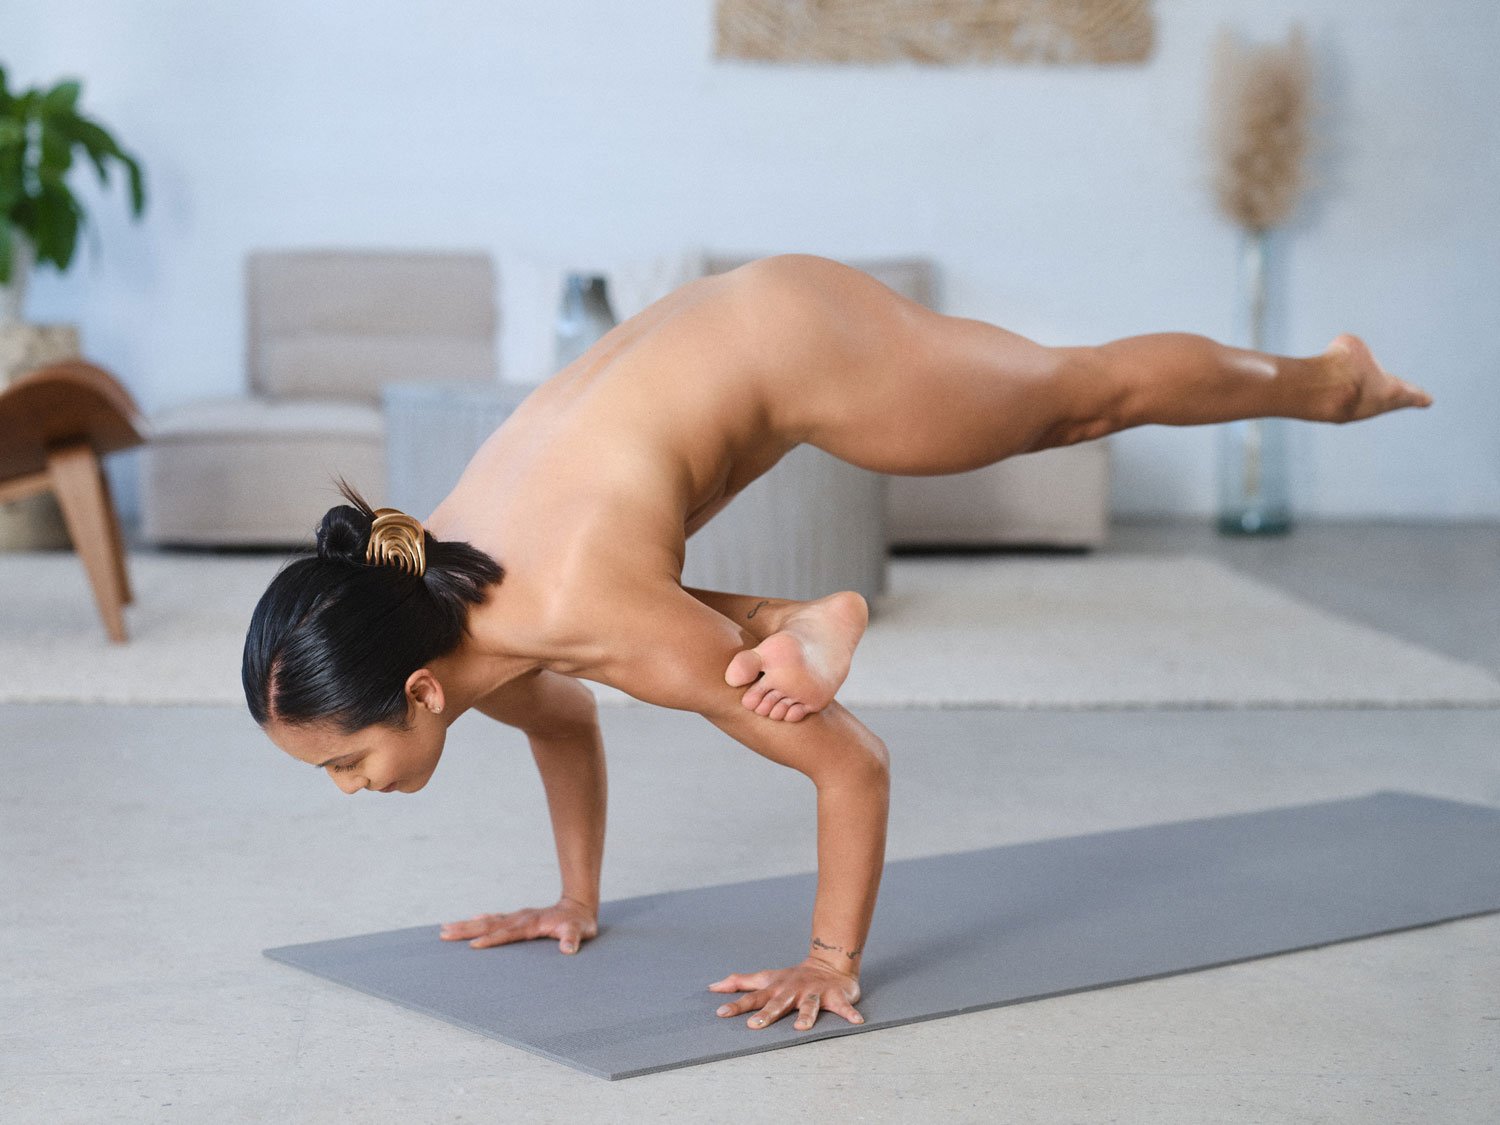
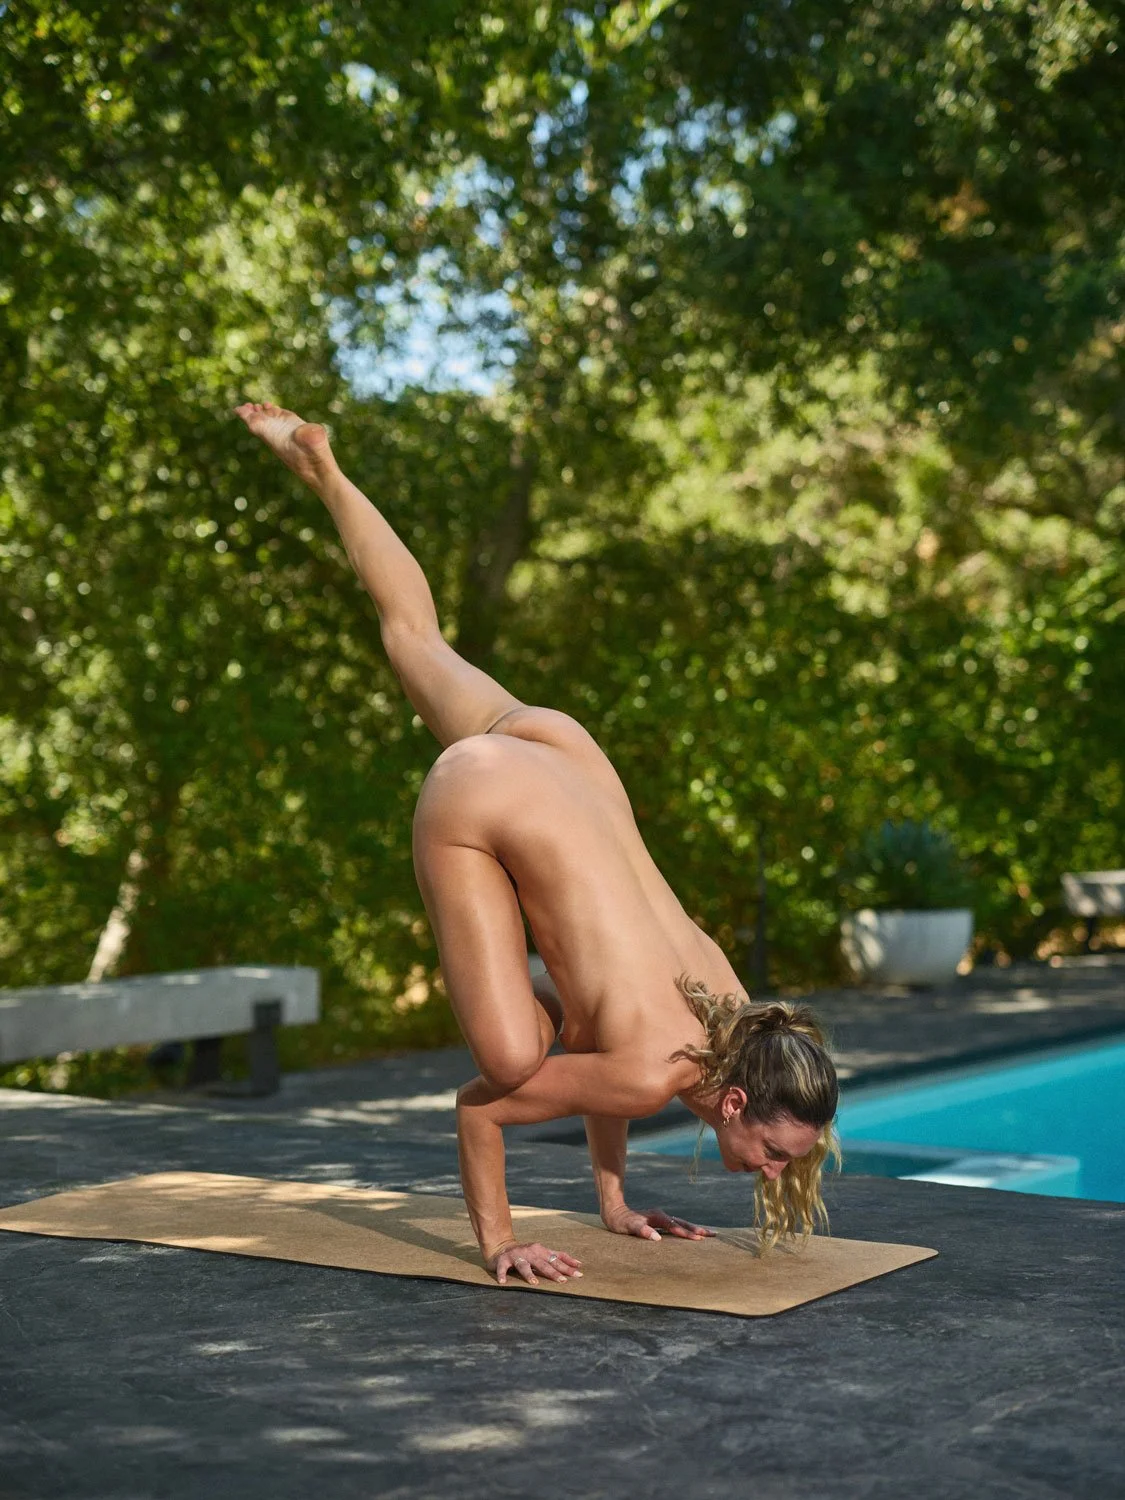
Take flight with Flying Pigeon Pose (Eka Pada Galavasana). It blends deep hip opening with a powerful arm balance that fires up your core, builds shoulder strength, and turns laser focus into lift.
Common Name: Flying Pigeon Pose
Sanskrit Name: Eka Pada Galavasana (ek-kah PAH-dah GAH-la-VAH-sah-nah)
Level: Intermediate
Pose Type: Arm Balance, Hip Opener, Inversion
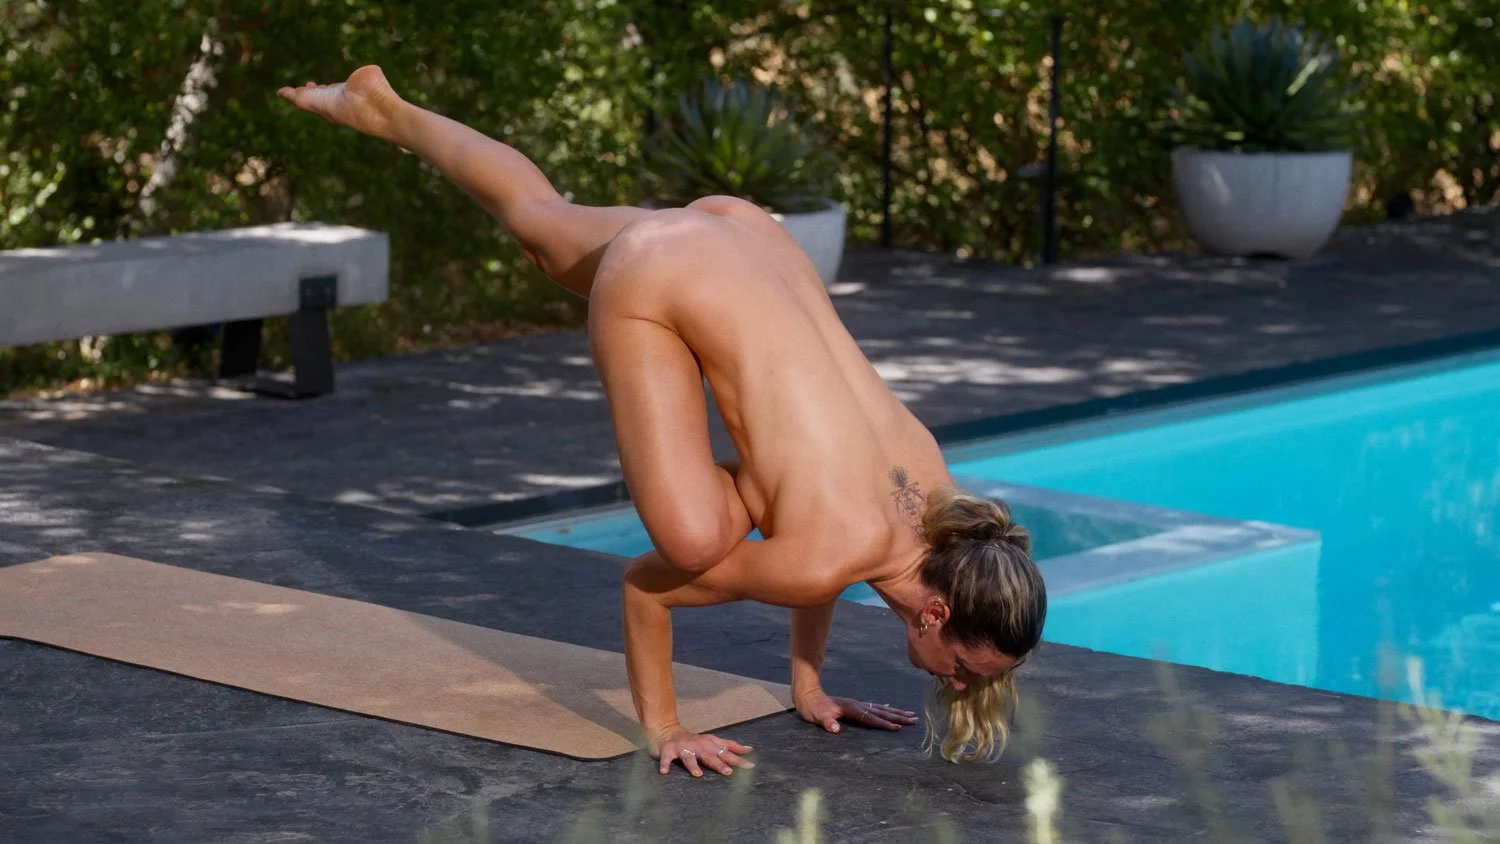
Flying Pigeon Pose, known in Sanskrit as Eka Pada Galavasana, is a powerful arm balance that blends deep hip opening with focused strength. The front leg externally rotates into a figure-four shape, which intensifies the stretch in the outer hip and glute. At the same time the back leg reaches long, engaging the hamstrings and glutes. Weight bearing through the hands strengthens the wrists, shoulders, and triceps. The pose also recruits the core for lift and stability, sharpening balance, body awareness, and mental focus.
Beyond its athletic feel, Flying Pigeon carries a bit of yogic lore. The posture is dedicated to the sage Galava and shows up in advanced vinyasa sequences where it often evolves from a standing figure-four fold into flight. Practiced consistently, it can help unlock stubborn hip tension, improve proprioception, and build confidence on the mat.
Flying Pigeon Pose Steps
Teacher: Lana
Step 1
Start in Chair Pose: From Utkatasana, feet hip-width, sit back, chest lifted, gaze forward.
Step 2
Make the figure-four: Cross your right ankle over your left thigh just above the knee. Flex the right foot to protect the knee.
Teacher: Steph
Step 3
Fold and plant hands: Keep the figure-four as you hinge forward. Place palms shoulder-width on the floor, shoulders stacking over wrists, fingers spread.
Step 4
Shelf the shin: Slide your right shin high across your upper arms. Aim the right foot toward the left triceps. Keep the chest buoyant and core engaged.
Step 5
Shift and float: Lean into your hands, bend the left knee, then tip forward until the left toes feel light. Lift the left foot and begin extending the left leg straight back.
Step 6
Hold and exit: Breathe for 3–5 steady breaths, hips level and elbows hugging in. Lower the left foot, uncross, return to Chair, and switch sides.
Modifications
Teacher: Steph
Start at the wall: Do Chair Pose facing a wall and lightly brace your head or hands for balance.
Hands on blocks: Place palms on sturdy blocks to create lift and reduce wrist strain.
Keep back toes down: Hover the back foot lightly on the floor instead of fully lifting.
Bent standing leg: Deepen the bend of the standing knee to lower your center of gravity..
Hip-opener prep: Warm up with reclined pigeon or seated figure-four before attempting the balance.
Benefits
• Opens hips and glutes
• Builds shoulder and arm strength
• Engages core for stability
• Improves balance and focus
• Enhances wrist and hand strength
• Stretches hamstrings
• Boosts confidence and body awareness
Cautions
• Wrist or shoulder injuries
• Knee or hip pain
• Hamstring strain
• Low back issues or sciatica
• Recent surgery
• Pregnancy
• Vertigo or balance disorders
• Uncontrolled high blood pressure